Protecting Garage Doors From Water Damage
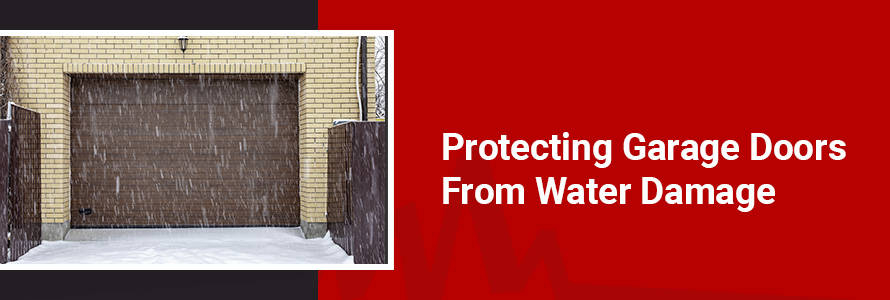
Your garage door is integral to the protection and security of your home. Severe weather conditions — especially heavy rainfalls and storms — can penetrate the door, compromise the system’s effectiveness, and cause expensive water damage.
How do you waterproof your garage door? This guide highlights how to protect your garage door to combat leaks that can negatively impact your space.
Common Garage Door Water Damage Issues
The following are common signs of water damage and the potential impacts on your garage door system:
- Rust and corrosion: You may notice rust or corrosion on the panel and other parts of metal doors. For nonmetal doors, corrosion on internal metal components like tracks and springs is a major sign of water intrusion.
- Warping and swelling: This is common with wooden garage doors that have absorbed water, leading to swelling and decay.
- Mold and mildew growth: Constant moisture creates the ideal environment for mold and mildew to thrive.
- Discoloration and stains: Water seeping into your garage door often causes discoloration and stains on the paint or floor.
- Cracks or peeling paint: Excess moisture can cause the garage door material to swell, leading to peeling paint or cracks.
Aside from visual signs of water damage, there are performance issues related to water damage, such as difficulty operating the door and unusual noises. These signs usually indicate structural damage.
Waterproof Garage Door Seals
Knowing the risks water poses, what can you put on your garage door to keep water out? The solution is installing weather-resistant seals, which offer additional benefits that improve protection and functionality, such as:
- Extending door life span: Using weather seals to limit exposure to the elements slows down wear and tear, reducing the risk of premature garage door replacements and maximizing your door’s service life.
- Preventing leaks: Weather seals prevent precipitation and moisture from seeping through the garage door and causing water-related damage such as swelling, decay and mold.
- Improving energy efficiency: Gaps around the garage door can allow conditioned air to escape and outside drafts to enter your space. Sealing these gaps regulates garage temperature, reducing energy costs.
- Blocking dust and debris: Wind and storms can significantly impact garage doors, blowing in dust and debris, which buildup on the door and impair performance. Proper sealing keeps the door’s system cleaner, reducing potential operational issues.
- Keeping out pests: Weather seals are an effective barrier against insects, mice and other pests that may enter the garage through gaps around the door.
Types of Garage Door Seals to Consider
Weather seals vary based on their function and material, so knowing the types you need to weatherproof your garage door is important. Also known as weatherstripping, these seals are made of flexible materials designed to line the edges of the door to fill gaps. Common materials to choose from include rubber, vinyl and silicone. The type of weatherstripping you use varies depending on where you need it.
Top and Side Seals
These effective seals block gaps at the top and sides of the garage door. Installation depends on the material and manufacturer’s mounting design. Some of these seals come with an adhesive side that you strip and press onto the door, while others, like vinyl weatherstripping, may require additional tools to secure it to the door’s frame.
While installing weatherstripping seems like a quick DIY project, consider professional garage door services to avoid damaging your garage door or frame. An expert will know the appropriate seal type for different parts of your door.
Bottom Seals
The bottom garage door seal is a common weatherstripping designed to line the bottom of the door. When placed, the seal sits between the bottom edge of the door and the floor, effectively sealing any gaps when the door closes. Since bottom seals are lined along the bottom of garage doors, they move with the doors when opening and closing.
Threshold Seals
These are different types of weatherstripping for the garage door’s bottom edge. Unlike a bottom seal, which attaches to the door, a threshold seal is installed directly on the garage floor using adhesives. While threshold seals are an alternative for the garage door base, they often work best alongside the bottom seals to create a strong barrier against the elements.
Preventative Maintenance Plans
Garage doors need regular preventative maintenance to ensure optimal performance and longevity.
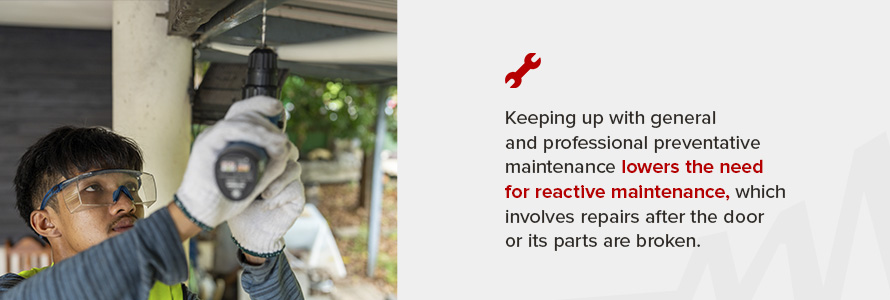
Keeping up with general and professional preventative maintenance lowers the need for reactive maintenance, which involves repairs after the door or its parts are broken. Waiting for your garage door system to break down before having a professional inspect it can be an expensive mistake.
Schedule periodic professional servicing, especially before winter. Other times, however, the following general maintenance tips will help prevent water damage:
- Inspect and replace seals: Working weatherstripping keeps water out. Inspection allows you to identify and replace worn seals for optimal moisture protection.
- Clean and lubricate the door: Frequently cleaning the door removes dirt, debris and road salt, which can accumulate and cause rust. Lubricate moving parts to keep them moisture-free and ensure the door closes well.
- Maintain proper drainage: Rainwater or melted snow should not flow directly to your garage door. Remove and combat puddles by creating a drench drain to redirect water away from the door.
- Clean the gutters: Clogged gutters located above the garage door can pour rainwater on the door. Clearing these gutters allows water to flow effectively.
When to Call a Garage Door Professional
If you already notice signs of water damage on your garage door, call professionals. Besides impairing performance, structural damage can seriously impact the door’s life span. Remember that minor damage can quickly snowball into major issues requiring heavy repairs or a total replacement.
Seeking professional repair services from experts like Continental Door takes the guesswork out of repairs, saving you money and likely saving your garage door. Our quick response team will visit your home, examine the damage and offer necessary repairs. We have garage door parts from all the top brands on the market to ensure quality replacements.
Depending on our expert analysis, we’ll advise on whether repairing or updating your garage door to a newer model is best. We have a diverse inventory of beloved collections, such as Avante®, Canyon Ridge® Louver and Bridgeport™ Steel.
Protect Your Garage Door With Continental Door
Waterproofing is key to protecting your garage door from water damage. Make waterproofing part of your overall preventative maintenance plan for a comprehensive approach to garage door upkeep. Call the experts at Continental Door for reliable garage door services and emergency 24-hour repairs.
We service residents of the Greater Spokane and Coeur d’Alene areas and the entire Inland Northwest. Contact Continental Door for professional assistance!
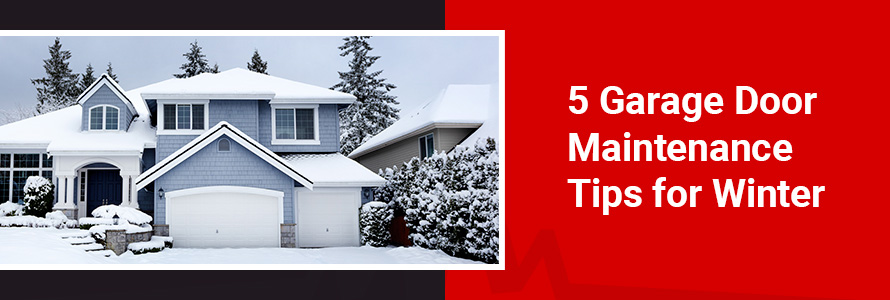
5 Garage Door Maintenance Tips for Winter
 Your garage door is perhaps the bulkiest object in your home, and it requires some attention to ensure optimal performance.
If you operate your garage door even three times a day, that’s already more than 1,000 cycles per year. As such, garage door maintenance is important, especially during winter due to the harsh elements. Is your garage door ready for winter?
Why Winter Garage Door Maintenance Matters
The winter season can damage garage doors that are not prepared to withstand the rough conditions. For residents of the greater Spokane area, winters are cold and snowy, and adequate home preparation is necessary. Common garage door concerns include operational failures caused by frozen components and increased wear due to fluctuating temperatures.
Keeping up with winter garage door maintenance protects your garage door and can:
- Increase the garage door life span: Taking care of your garage door in winter prepares it for harsh conditions and lowers the risk of damage. These maintenance practices can slow down wear and tear, increasing your garage door’s service life.
- Reduce maintenance costs: An unexpected breakdown in winter could lead to costly repairs. Preventive maintenance allows you to catch minor issues and resolve them before harsh weather makes things worse.
- Improve energy efficiency: Your garage door could increase your energy bills in winter by letting in freezing air. Winter maintenance can help make the door more energy-efficient by ensuring proper insulation. Besides cost savings, an energy-efficient garage door adds to your home’s warmth and comfort in winter.
It’s best to winterize your garage door before the winter season, but you can still complete these activities during the cold season.
5 Garage Door Maintenance Tips
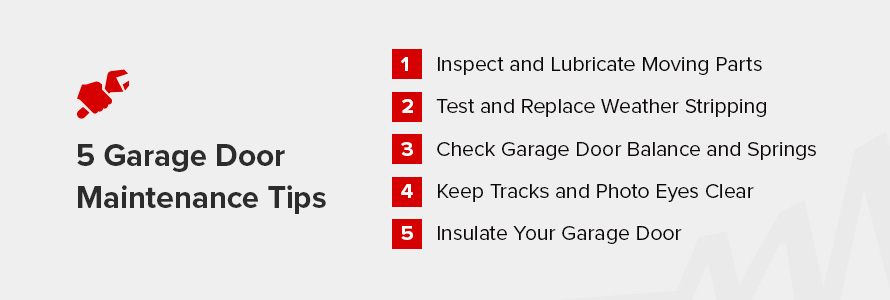
Winterizing your garage door involves a few steps that will help keep your home warm and safe when the season kicks in. Here is your garage door winter maintenance checklist.
1. Inspect and Lubricate Moving Parts
Inspection is an important garage door preventive maintenance practice that doesn’t require professional expertise. Examine the door, its moving parts and how it operates to ensure everything is in order. Call a garage door technician if you notice signs of damage or severe wear and tear.
If you have not flagged any issues, proceed with lubrication. You want to lubricate moving parts like hinges, rollers and springs because freezing temperatures can stiffen them, making it challenging to operate the door. To avoid touching parts like springs, use a silicone-based spray lubricant you apply from a distance.
2. Test and Replace Weather Stripping
Is your weather stripping in good condition? You can test it by closing the door. If you notice light penetrating the space where the bottom of the door comes in contact with the floor, your weather stripping likely needs replacing. This rubber material lines the bottom of the door, prevents damage to the door and floor, and keeps debris and the elements from entering your garage.
3. Check Garage Door Balance and Springs
Balance is crucial to the proper function and longevity of your garage door. Unbalanced springs could strain vital components, which may result in damage and make operating the door dangerous. Heavy precipitation and winter winds could accelerate damage to an unbalanced garage door.
Garage door springs hold the weight of your door. When they are balanced, they keep the door from going back up when it’s down or dropping when it’s up. Here’s how to check garage door balance:
- Close the garage door.
- Disengage your garage door opener for manual operation.
- Open and close the door manually.
- Lift the door halfway, let go and confirm that it stays in position — if it doesn’t, it is off-balance.
4. Keep Tracks and Photo Eyes Clear
Over time, debris can collect in garage door tracks. Clogged tracks impair the operation and strain the opener. Cleaning the tracks allows the door to operate smoothly, protecting your garage door opener and extending its life span.
Clean the tracks with a brush, vacuum cleaner or cloth. You should also clean the photo eyes to ensure they function properly.
5. Insulate Your Garage Door
An insulated garage door prevents the valuable heat in your home from escaping and keeps cold air outside. Call professionals to upgrade you to the latest insulated garage door, or you can take steps to improve the insulation in your existing door. To ensure proper insulation for winter, you may want to bring in garage door experts.
Additional Tips for Winter-Proofing Your Garage Door
Winter-proofing your garage door is necessary to ensure an incident-free season. Here are tips to ensure adequate winter-proofing:
- Inspect your garage door regularly: Winter can be long, so it may still take a toll on your garage door even after you follow the checklist. You can inspect your garage door consistently to keep things in good condition and avoid surprises. It’s the best way to spot a developing problem.
- Schedule professional service: It’s also advisable to schedule prewinter professional service if your garage door shows signs of weakness. Some companies also offer emergency garage door services for sudden issues.
- Get the right tools and products: You’ll likely need a spray lubricant and a brush or cloth to wipe down the tracks. We don’t recommend undertaking garage door repairs yourself if you lack professional expertise because garage doors are heavy devices with a high potential for serious injuries. They also comprise diverse components that require expert care to prevent accidental damage.
When to Call a Professional
General maintenance is likely insufficient if your garage door is not in good condition. Professional garage door services become necessary when repairs are needed. Professionals ensure thorough servicing, save time and prevent further complications that could increase maintenance costs.
Contact garage door repair professionals if you notice any of the following:
- Noticeable wear and tear: If you see visible wear and tear, winter may exacerbate the issue, accelerating wear and tear and reducing service life.
- Persistent issues: If you experience persistent operational issues despite regular garage door maintenance, it’s time to bring in experts.
- Visible damage: Aside from worn parts, visible damage is a serious issue that requires professional attention, especially if it involves key components like springs, panels or cables.
Winterize Your Garage Door With Continental Door
Implementing winter garage door maintenance tips, such as inspecting, insulating and lubricating the door, is the best way to prepare your garage door for the cold months. These preventive maintenance strategies reinforce your door and slow wear and tear. However, if you notice glaring issues, reach out to professionals.
If you live in the greater Spokane and Coeur d’Alene areas, Continental Door is your local, reliable garage door company offering quality solutions. With professional maintenance, you can avoid weather-related issues in winter. Schedule a tuneup today to ensure your garage door is winter-ready!
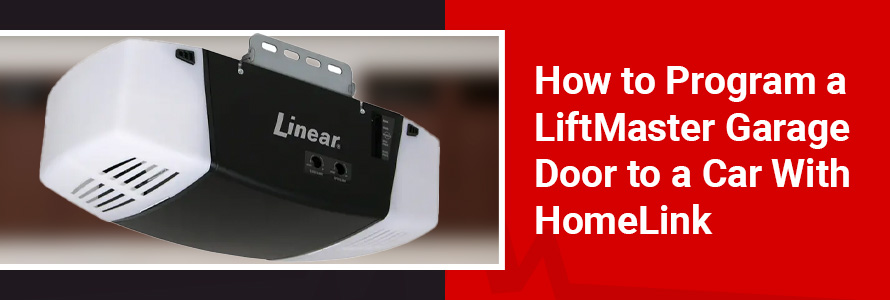
How to Program a LiftMaster Garage Door to a Car With HomeLink
 Garage door openers have created much convenience, allowing homeowners to operate their garage doors remotely without needing to exert physical effort. From the outside, you would typically use a remote control to trigger the opener and open your garage door. But what happens when you lose or misplace the remote?
By programming your LiftMaster garage door opener to your vehicle using HomeLink, you won’t have to worry about getting back into your garage if you can’t find the remote control. This guide will take you through the easy integration process to ensure convenience.
What Is HomeLink?
HomeLink is a technology that facilitates the automation of vehicles and smart household products, such as electronic devices, locks and lighting. The technology is compatible with many vehicle makes and models. In vehicles that have integrated HomeLink, the controls are located on the visor, the overhead console or the rear-view mirror.
HomeLink is compatible with many garage door openers, like LiftMaster, and offers seamless integration. The connection allows you to control the opener from inside your vehicle.
Step-By-Step Guide to Program a LiftMaster With HomeLink
Programming your LiftMaster door opener to your car takes a few steps. You can establish the connection with or without your current door opener remote. If you notice signs of malfunction on your garage door opener, get a technician to repair it before you proceed. First, locate the three HomeLink buttons in your vehicle and prepare for integration.
How to Program a LiftMaster to a Car With a Remote
Since you need to use your car while it’s on, move it outside the garage for safety reasons but not far from the door. Pair the devices following these steps:
- Press the HomeLink control buttons: As mentioned, the HomeLink control system inside your car features three buttons. Press the two buttons on either side to put the wireless system in learning mode. You want to hold the buttons for at least 20 seconds, as that’s enough time for the indicator to begin flashing, signaling it’s time for integration. Pressing the buttons longer than 30 seconds is only necessary if you want to clear a previous connection with a different garage door opener.
- Pair your remote control: Test the remote to ensure it currently controls the opener and keep it with you as you select the HomeLink button you want to pair with the remote. Simultaneously press the HomeLink button you’d like to program and the remote button. You’ll know the programming was successful when the HomeLink indicator flashes.
- Activate the HomeLink system: Press the paired button on your HomeLink control system to activate it for the garage door operation. Your LiftMaster HomeLink setup with remote control is complete.
How to Program a LiftMaster to Car Without a Remote
You can still pair your LiftMaster opener with your vehicle’s HomeLink system without a remote control. This alternative integration is necessary if you no longer have your remote around or the door didn’t close when you first paired the remote. Pairing your vehicle directly to the opener is time-sensitive, as you have 30 seconds to complete the integration. Follow these steps to pair your Liftmaster opener with your car’s HomeLink without a remote control:
- Find the LiftMaster learn button: Go to your opener and locate the “Learn” button. It is usually above the antenna wire or under the light cover. Depending on the opener model, the learn button may be orange, purple, green, or yellow.
- Press the learn button: Quickly press the learn button without holding it down and return to your vehicle. You have 30 seconds to press and hold the HomeLink button. If you can see your opener, its light should blink once to indicate that the connection is successful. Test your garage door and repeat the process if nothing happens.
Remember, garage door openers vary by make and model. If nothing works or the above steps are not applicable, contact garage door experts for professional solutions.
Troubleshooting HomeLink and LiftMaster Pairing Issues

Are you wondering why your car won’t pair with your garage door opener? That happens sometimes for various reasons. Your vehicle’s HomeLink system may not accept remote programming and could need an additional device called the compatibility bridge to enable the connection to your LiftMaster. Other common causes of pairing issues are drained remote control batteries, too many codes on the opener and special integration instructions.
Here are possible ways to resolve connection problems depending on what the issue is:
Restoring Compatibility
Some vehicles equipped with the HomeLink system will not directly integrate with your LiftMaster garage door opener. You may need to add a LiftMaster compatibility bridge, often called a repeater, to your opener. It’s a compact device that ensures connection when everything else fails. However, it’s important to be certain that you actually need a compatibility bridge to link your vehicle with the opener.
Bring in garage door opener experts to examine your opener. If you need the bridge to pair your vehicles, they can assist with installation and advise you further.
Clearing Previous Memory
Sometimes, garage door openers have issues you can resolve by resetting the unit, which clears the memory of every paired accessory. In LiftMaster, the learn button also acts as a reset button, so you should never press and hold it unless you intend to reset it. Hold the learn button until the LED light blinks on and then off after six seconds. This action wipes the memory so you can pair the car’s HomeLink system using the learn button.
Following the User Manual
The steps to programming your garage door opener with HomeLink may differ slightly depending on your opener model. It’s always best to consult your user manual to determine what you’re missing.
Benefits of Using HomeLink With a LiftMaster
HomeLink and LiftMaster have partnered to offer more convenience and automation. Here are the benefits of using HomeLink with your LiftMaster door opener:
- Vehicle automation: LiftMaster already provides smart operation through its MyQ connectivity technology, which allows you to monitor and operate MyQ-enabled openers with your smartphone. HomeLink and LiftMaster integration offers direct garage door automation from the comfort of your vehicle, eliminating the need for keypads.
- Improved security: Many people use their garage as the main entrance to their home and leave the door connecting the garage and the main house unlocked, meaning anyone who has your remote could get into your home. With your vehicle’s HomeLink system paired with your garage door opener, you won’t have to worry about misplacing your remote.
Contact Continental Door for Garage Door Opener Services
Operating your garage door from your vehicle increases security and convenience and removes reliance on hand-held controls. LiftMaster offers stable programming with your vehicle’s HomeLink system. While you can handle the integration yourself, many factors can impact the pairing, from issues with the opener to complications with your HomeLink transmitter.
Streamline integration by working with a reliable garage door company experienced in garage door systems and door opener solutions. Continental Door is your local provider in the greater Spokane area. Our garage door technicians have years of expertise and are available for 24-hour emergency services. To learn more or for expert assistance, get in touch today!
Guide to Amazon Key

Guide to Amazon Key
As the world evolves, technology becomes a more significant part of everyday life. One of the biggest technological trends today is online shopping. Purchasing an item that may not be in your local store and having it delivered appeals to consumers.
Amazon is one of the most popular online retailers. In 2024, Amazon’s brand worth was around $185 billion, and there were more than 200 million Prime members globally. Since there are millions of Prime subscribers, Amazon frequently updates the benefits so the membership remains enticing.
A relatively new benefit for Prime members is Amazon Key In-Garage Delivery. This service allows couriers to deliver packages to your garage.
What Is Amazon Key and How Does It Work?
Amazon Key In-Garage Delivery aims to provide a secure transit between sellers and buyers. Although granting strangers access to your garage may raise privacy concerns, its main benefit is protecting your property. Simply put, Amazon hopes to help you reduce your risk of package theft or other property damage by asking you to give their delivery team authorization to enter your garage.
In 2024, 58 million Americans were victims of package theft. Despite a penalty that includes fines and up to five years in prison, package theft remains a significant problem for consumers. Considering this, online retailers are eager to find more secure methods of ensuring an item reaches its intended target. By granting entrance to your garage, you ensure your packages are delivered to a secure location.
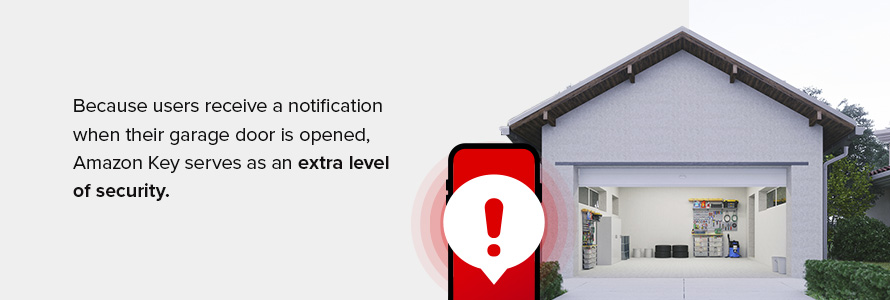
While delivery security is the primary push for Key, Amazon also touts the service’s everyday utility. Because users receive a notification when their garage door is opened, Amazon Key serves as an extra level of security. It can let parents know when their children come home and alert homeowners of unwanted guests. Additionally, it can even provide peace of mind on busy mornings, quickly putting to rest the worry of whether you’ve forgotten to close the garage door.
How Does Amazon Key Delivery Work?
The Amazon Key service is straightforward, requiring only a few simple steps:
- First, you need to link your myQ garage to the Key in Amazon’s shopping app.
- The next step is choosing “In-Garage Delivery” instead of “Doorstep Delivery” when checking out.
- You’ll receive notifications updating you on your package’s shipping and delivery. Once the driver arrives with it, they scan its barcode, and a company representative verifies the time and other confirmation details and grants them one-time access to your garage.
- The driver delivers the package and notifies the representative through their app of completion.
- After completing delivery, the same representative remotely closes your garage door. You then receive a notification confirming the completion of the process.

Is Amazon In-Garage Delivery Safe?
Customer safety is the highest priority, which is why Amazon does background checks on all potential delivery drivers for In-Garage Delivery service. It also verifies every step of the package’s delivery — once the driver scans it, Amazon verifies its location, the driver and the package itself.
After the verification steps are complete, the driver receives one-time access to your garage. Amazon also instructs their drivers to venture no further than 5 feet into your garage to deliver the package. In order to complete their delivery and move on to the next, they must tap a button in their app, which confirms the delivery and closes your garage. Because it’s a once-off access key, they can’t re-open your garage after it closes unless they have another package to deliver to you.
Amazon also trains its drivers to leave your garage as they found it. This applies not only to your belongings but the garage door itself. For example, if your garage door is open when they arrive, they will leave it open after completing their delivery and vice versa.
However, if your garage door doesn’t close when it’s supposed to, the driver will remain on the property until it closes. Customer support may contact you to keep you updated and communicate with you to close it.
If you still feel uneasy with these security measures, there are some other options you can take advantage of. You can purchase the optional camera, which allows you to monitor deliveries in real time. You can also turn off Amazon Key In-Garage Delivery the day before delivery, restricting access to your garage and returning to doorstep delivery.
Amazon also considers its drivers’ safety. It advises homeowners to keep their pets in their homes, which protects drivers from encountering an overly excited or aggressive pet. Amazon instructs their drivers to drop off the package at the front door if they do come across any pets. This precaution also ensures the package and the pets remain safe and secure.
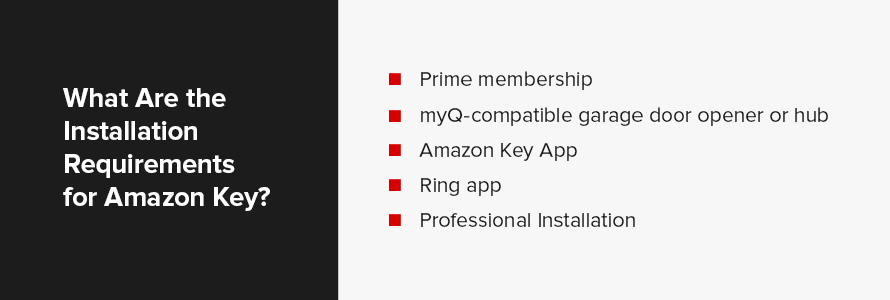
What Are the Installation Requirements for Amazon Key?
While the service is simple, a few requirements exist for setting up Amazon Key In-Garage Delivery. If you already have some of the starting pieces — such as an Amazon Prime account or Amazon Key-compatible garage door openers — the installation process will be easier. Moreover, professionals may be able to assist you through the selection process, ensuring you get the appropriate materials for your needs.
Here is a basic rundown of the tools you’ll need to operate Amazon Key:
- Prime membership: First, to be eligible for delivery services, you need an Amazon Prime membership. Prime membership is Amazon’s customer service bundle, which includes free two-day shipping on most items, access to video and music streaming and perks for Alexa smart speakers.
- myQ–compatible garage door opener or hub: If you don’t currently have a garage door opener with Wi-Fi capabilities, you’ll need to upgrade it. Be sure your equipment is myQ-compatible to avoid having any issues using the Amazon app. If you have a gated property, you also need to install the Amazon Key Liftmaster to allow drivers to open the gate.
- Amazon Key App: As always, there’s an app for that. The free Amazon Key app is your remote access point. It’s available for both Android and iOS, though only in U.S. app stores. You can also access In-Garage Delivery through the Amazon Shopping app.
- Ring app: You can use the Ring app to add a compatible camera, such as the Ring Indoor Cam and the Ring Stick Up Cam, to watch your deliveries in real time. However, you don’t need a camera for In-Garage Delivery services.
- Professional Installation: Continental Door can upgrade your garage door opener to ensure myQ compatibility and set up Amazon Key.
Amazon Key FAQ
While there are clear positives to using Amazon Key, new technology always brings its share of concerns. Here are some of the most frequently asked questions about Amazon Key In-Garage Delivery:
1. Is Amazon Key Only for Prime Members?
Amazon Key is only available to those with an Amazon Fresh, Amazon Prime, Amazon Household and Prime Student subscription or a free trial of these subscriptions. You also need to be in an eligible location for In-Garage Delivery.
2. Can I Store Camera Footage?
The compatible Ring cameras allow you to record your videos if you have a Ring Protect Plan. Without the Ring Protect Plan, you can access Live View to monitor the delivery.
3. What if My Garage Won’t Close?
Drivers must leave your garage as they found it. So, if your garage was closed, they must close it before they can go. Similarly, if you leave your garage door open, the delivery driver will not close it before leaving. If you leave your door closed, but the driver can’t close it after delivering your package, customer support will contact you and have a technician come and close your door.

Get Professional Installation for Amazon Key From Continental Door
Packages disappear off customers’ doorsteps daily. To prevent this, many people utilize Amazon Key. With the right setup and equipment, you can enjoy increased security and comfort when you’re expecting your next delivery.
Continental Door can install and maintain your myQ System for Amazon Key. For over 15 years, we have provided high-quality services, including 24/7 emergency repair and products to our customers in the greater Spokane and Coeur d’Alene areas. Contact us today for a free quote to set up your Amazon Key.
Can You Paint Garage Doors?

Can you paint your garage door? Yes, but there are considerations.
A fresh coat can be the fastest way to restore the door’s shine or create a new look that complements your home’s exterior. Either way, painting your garage door is a small investment in time and money, which rewards you by enhancing your home’s curb appeal. If you want to repaint your garage door, our guide walks you through the considerations and tips for a successful project.
What Types of Garage Doors Can You Paint On?
Garage doors are made from various materials, from fiberglass and metal to solid wood. These materials have different characteristics and different painting needs. As a homeowner, you may have asked yourself, can you paint a metal garage door? What about vinyl?
Metal doors, for instance, need washing with trisodium phosphate (TSP) solution before sanding with fine-grit sandpaper to remove rust and peeling paint. Then, you’ll need to use a primer designed for metal, such as zinc-based primer and top it with oil-based paint. Wooden doors also require specific primers and sealants to cover cracks, prevent moisture and preserve the material.
Since different materials may require different primers and exterior paints, it’s best to check the manufacturer’s recommendation to ensure a quality outcome.
Things to Consider Before Painting Your Garage Door
Applying a new coat of paint to your garage door is one of the many maintenance tips that save you money in the long run. The paint serves as a protective layer that combats damage and degradation, preserving the door’s life span.
Here are things to consider to ensure a proper paint job:
- Type of door: Consider your door’s material to determine which primers and paints are compatible. Getting the right products for your paint job promotes adhesion and longevity.
- Condition of the door: It is crucial to assess the condition of your garage door before repainting. If it has damage or serious signs of wear, you should resolve that before applying a fresh coat. Wooden doors, for example, may have cracks, mold, termite infestation and even rot. Metal doors may have dents or corrosion. In such cases, call a technician for a professional inspection and repair before painting the door.
- Prepping needs: Before painting your garage door, go over the prepping steps. These may include pressure washing or scrubbing the door with a sponge to remove dirt, grime and chipping paint. Rough edges and old paint may need light sanding. Once you prime the door, allow enough time for the coat to dry before applying paint.
- Weather conditions: Extreme temperatures will impact how the paint dries and may cause premature flaking or fading. Watch the weather to choose a dry day that’s neither too cold nor too hot.
- Warranty terms: Check the manufacturer’s warranty before repainting your garage door. The manufacturer may have guidelines for applying cosmetics, and you may have to stick to a specific color range to avoid voiding your warranty.
How to Paint Garage Doors
Painting involves a few critical steps that require care and attention to bring out the door’s original shine. Since painting is one of the various garage door preventive maintenance strategies to ensure top shape, consider doing things right the first time by working with an expert. That said, here are steps to painting your garage door:
- Mix the paint: After your primer has dried, mix the paint in a bucket away from direct sunlight. Mix the paint thoroughly to get the right consistency and prevent separation.
- Paint the door panel: The bulk of the task is painting the panel, which is often split into multiple squares. You can paint with rollers or traditional brushes. Whichever method you use, keep track of the amount of paint that goes into individual squares to ensure the entire panel remains consistent in color.
- Paint the trim: The trim is a key part of your garage door, and painting it the same or a different color allows it to blend or contrast with the door.
- Paint the frame: The door frame can be just as tricky to paint as the stiles and rails. Pay attention to the frame for cohesive blending.
- Add another coat: Your garage door likely won’t need more than two coats of paint. However, make two the minimum so that you can achieve the most durable and seamless finish.
How Long Does a Garage Door Paint Last
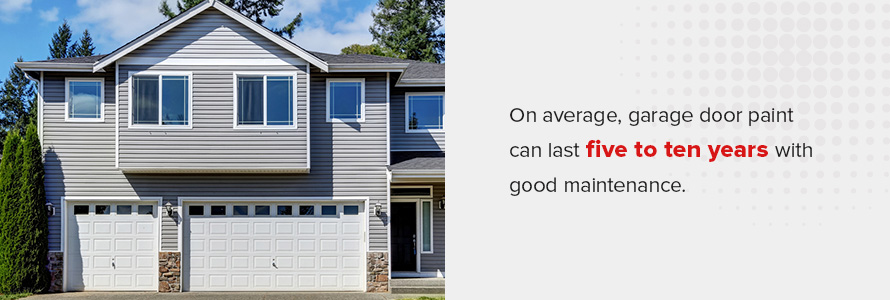
A high-quality paint job on a proper surface should last just as long as the original paint. On average, garage door paint can last five to ten years with good maintenance. However, various factors impact the life span of a garage door paint job, such as:
- Surface preparation: A well-prepared surface is necessary for the paint to stick effectively.
- Paint quality: Top-quality paints from recognized brands are well-tested for durability and last longer than low-quality alternatives.
- Expertise: Skill is crucial to doing things properly. Consider professional services for long-term performance.
- Weather condition: Garage doors are exposed to the elements. In areas with severe weather, the paint may deteriorate sooner than usual.
- Maintenance: Proper maintenance is key to preserving the quality of your garage door paint.
Safety Considerations When Painting
Painting tasks like preparing the surface, sanding, filling and applying primer and paint can expose you to hazardous substances that may contribute to health issues. Exposure to substances such as metals, chemicals and fungi depends on the task, product and the level of precaution you take.
Since different products have different safety precautions, paying attention to the label for adequate care is important. Besides exposure to dangerous substances, there are safety measures for preventing physical harm. Review general painting safety measures to use products correctly and consider working with an expert rather than doing it solo.
When to Consider Replacing Your Garage Door
Your garage door is a prominent part of your home that plays a big role in its overall appearance. When should you consider replacing your garage door over repairs and cosmetic upgrades to ensure improved curb appeal?
If your garage door has served you for a decade or more, it may have performance issues and poor looks due to increased wear. While painting the door can restore its brilliance, it does not resolve the level of wear and tear or improve preexisting damage. In this case, a new door offers upgraded features, excellent appearance and the colors you prefer without sacrificing efficiency.
If you’re interested in changing the door’s material, a replacement is also best. For instance, instead of painting a garage door to look like wood, find a solid wood or premium faux wood material for a woodlike finish with much more robust features.
Upgrade Your Garage Door With Continental Door
For homeowners in the greater Spokane area, the warm summers offer the perfect opportunity to repaint their garage doors. Work with industry experts to ensure excellent quality, appearance and longevity. Continental Door is a garage door provider with expert technicians knowledgeable about different brands.
We provide professional painting and other residential maintenance services. We can also inspect the condition of your garage door and advise on quality replacement.
Schedule a service today to learn more!
How Much Headroom Do I Need for My Residential Garage Door?
How Much Headroom Do I Need for My Residential Garage Door?
If you’re thinking about getting a new garage door or installing a new garage door opener and are wondering if you have enough garage door headroom clearance, you might be curious about just how much headroom you need for the garage door system you have in mind.
Request EstimateMinimum Clearance for Garage Door Installations
You’ll want a minimum of 15 inches of overhead clearance for a standard garage door with an electric opener. This translates to 12 inches for the door and torsion spring system and 3 inches for the garage door opener equipment. What if you don’t have 12 to 15 inches of space to work with? Do you have to abandon your dreams of a new garage door or opener? The answer is no. You have several other options to consider:
- Low–headroom track systems: Low-headroom track garage door systems suit low-headroom garage door situations. With this system, you may be able to install your garage door and opener with as little as 9 inches of overhead space.
- Frame–down opening: Frame-down opening doors are available in 3-inch increments, so you can simply lower or raise your garage door opening to meet your desired opening height.
- Jackshaft garage door openers: If you need to save a few inches of space where the garage door opener unit would normally go or if there is a beam in the middle of your garage, try looking into a jackshaft garage door opener. These openers are effective and installed on the side of your garage rather than the top, eliminating the need for extra headroom and keeping the middle of your garage clean and spacious.
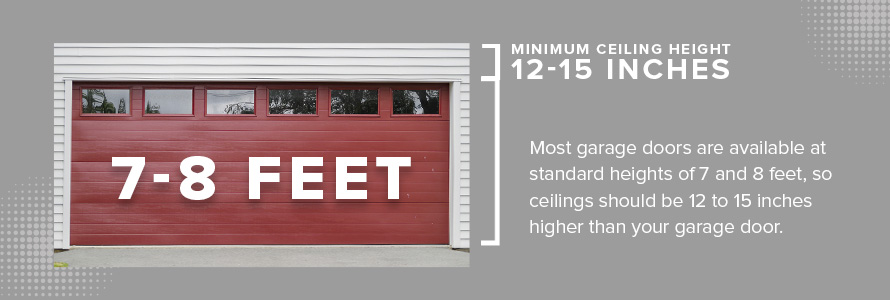
What Ceiling Height Do You Need for a Garage Door?
Residential garage ceiling heights differ. Most garage doors are available at standard heights of 7 and 8 feet, so ceilings should be 12 to 15 inches higher than your garage door.
Solutions and Considerations for Limited Headroom
Some considerations for headroom requirements include different track system configurations, various garage door opener types, and potential obstructions like ductwork or beams. The headroom space must be free of obstructions such as lighting or a support beam so the door can travel smoothly.
Let’s explore these considerations:
- Garage door opener type: A belt or direct-drive opener needs less headroom than a chain-drive opener, making it more efficient in low-headroom garages. Wall-mounted openers also save space compared to ceiling-mounted alternatives.
- Custom garage door configurations: Although standard sizes are available, they’re not always suitable. Custom garage door installations provide a unique solution for garages with limited headroom.
- Proper installation: A professional installer will advise you on the best door size and alignment and use the proper installation techniques if the initial installation was not completed correctly.
Some solutions include:
- Removing obstructions: Remove obstructions such as ductwork and beams that take up space.
- Finding alternative garage door styles: Consider installing vertical lift or side-hinged doors that open outward instead of overhead, or choose roll-up or sectional doors with low headroom options.
- Installing space-saving openers: The right opener, such as a direct-drive or jackshaft opener, will help save headroom space.
Why Choose Continental Door to Install the Right Garage Door?
Continental Door has served the greater Spokane and Northern Idaho areas for over 15 years, providing exceptional service to our customers. Our garage door technicians analyze your requirements before taking action for the best outcome and ensure thorough work from start to finish.
Whether assessing your garage door’s minimum headroom requirements to determine a suitable door or installing an appropriate-sized opener to accommodate your low headroom space, they’ll inspect every aspect and recommend an ideal solution.
Contact Continental Door for Expert Garage Door Solutions in Washington and Idaho
At Continental Door, you’ll receive outstanding service from our team of professional, skilled and experienced garage door technicians every time. We’ll handle any garage door issue and ensure expert solutions that suit your needs.
For advice about headroom space for your residential garage door or any other concerns, contact us or request a free estimate for door repairs, replacements or installations.
Request Information About Garage Doors
Does Home Insurance Cover Your Garage Door?
Homeowners insurance does cover garage doors in some circumstances. As a homeowner, you want to ensure you’re prepared should you need to repair or replace your garage door. Discover the ins and outs of when home insurance may cover garage door damage.
Understanding Home Insurance and Garage Door Coverage
Garage doors are sometimes covered by home insurance. Explore when you’ll typically be covered and situations where your insurer may not cover the damage.
What Is Typically Covered?
These are some of the common instances where you are likely covered:
- Damage from windstorms, hail and lightning strikes: You are typically covered against weather-related perils like lightning strikes, hail and wind. Even so, it is a good idea to invest in a garage door that can withstand heavy winds and extreme weather.
- Fire damage: If a fire breaks out in your garage or home and damages the garage door, your policy usually covers the repair or replacement costs. Damage from soot and smoke is included.
- Break-ins: Break-ins that damage your garage door are generally covered by insurers.
- Vehicle damage: If a vehicle accidentally damages your garage door, your policy often covers the repair costs. Auto insurance may come into play in some scenarios, which we’ll cover in greater depth below.
Exceptions and Exclusions

There are certain exceptions and exclusions to understand. Additionally, depending on how comprehensive your insurance is, specific damage may or may not be covered. These are some common scenarios in which your garage door might not be covered:
- General wear and tear: Damage caused by normal wear and tear is typically not covered by home insurance policies, and you will need to cover the repair expense.
- Intentional damage: If the insurer finds that the damage was caused intentionally by the homeowner or other residents, it is excluded from coverage.
- Poor maintenance and upkeep: If the damage is due to a lack of proper garage door maintenance and long-term neglect, your insurer will likely not cover the repairs.
- Floods, earthquakes and wildfires: Standard home insurance policies often exclude damage caused by certain natural disasters, such as floods, earthquakes and wildfires. You can usually add endorsements or separate policies to ensure you are covered in the event of such disasters.
A Closer Look at What Is and Isn’t Covered
Understanding the extent of your home insurance coverage is crucial. Explore some specific circumstances below.
Does Homeowners Insurance Cover Detached Garage Doors?
Detached garages often require separate coverage under an “other structures” policy because they are not attached to your home. Without one of these policies, damage to your detached garage might not be covered, and you would be responsible for covering the costs of repairs or full garage door replacement.
Attached garages are typically covered under your standard home insurance policy. However, you should always check your policy details to ensure you are adequately covered for either type of garage door.
Does Home Insurance Cover Garage Door Repairs?

While standard home insurance policies generally cover garage door repairs, the extent of coverage can vary significantly based on specific policy terms. Factors such as the type of damage, the cause and the policy’s coverage limits play crucial roles in determining how much the insurer will potentially pay out.
For instance, some policies may fully cover repairs and damage caused by falling trees or theft, while others might have exclusions or require higher deductibles. Additionally, certain policies might offer extra endorsements for enhanced protection.
It is essential to review your policy details and consult with your insurance provider to understand the exact terms and extent of your coverage.
Does Home Insurance Cover Garage Door Springs?
Home insurance generally covers garage door springs if the damage was due to a covered peril, such as fire or theft. However, damage from general wear and tear or poor maintenance is typically not covered. To be sure, check your policy’s specific details.
Does Car Insurance Cover Hitting a Garage Door?
If you accidentally hit your garage door with your car, your homeowners insurance policy will typically cover the damage done to the door. If you have collision coverage, you can likely use it to cover the damage to your vehicle. However, in some circumstances, auto insurance can cover damage to garage doors. For example, if someone else’s vehicle hits your garage door, their liability car insurance should cover the damage.
Filing a Claim for Garage Door Damage
Knowing how to file a claim streamlines and quickens the repair process when your garage door sustains damage. Here are the steps to take when filing a claim:
- Assess the damage: Inspect the damage and take detailed photos and videos as evidence.
- Determine who is at fault: Identify what or who caused the damage. Was it you, a third party or natural elements?
- Review your policy: Check your insurance policy to understand what is covered and determine if any deductibles apply.
- Contact your insurance provider: Notify your insurance company immediately and ask what documentation is required.
- Gather documentation: Collect all the necessary documentation, including your insurance policy, third-party insurance information, photos of the damage and repair estimates.
- Submit the claim: Your insurer will provide you with a claims form, which you must fill out and attach all the required documentation to.
- Schedule an inspection: An adjuster might be sent out to inspect the damage and assess the claim — this step is not always applicable.
- Follow up and maintain contact: Keep in contact with your insurer to track the progress and state of your claim.
- Repair and reimbursement: Once approved, have your garage door repaired by a reputable company.
The entire process can take a few weeks, depending on the complexity of the claim and the insurer’s responsiveness. It might be worth seeing if you can repair the damage and then receive a reimbursement.
Consult Your Insurance Provider and Speak to Continental Door, Co. About Our Garage Services
As a homeowner, it is essential to know what type of coverage you currently have and whether you need to change or upgrade your policy to ensure your garage door is covered. You can contact your insurance provider to find the best way forward for your needs.
When you need 24/7 emergency garage door repairs or any other residential garage door products and services, Continental Door is here to help. We have been serving residents of the greater Spokane and north Idaho areas since 2000 and continue to provide value-added services, such as free estimates and quotes.
When you’re looking for a responsive repair team or wish to install a new garage door, get in touch with us online, and we’ll see that you are helped without delay.

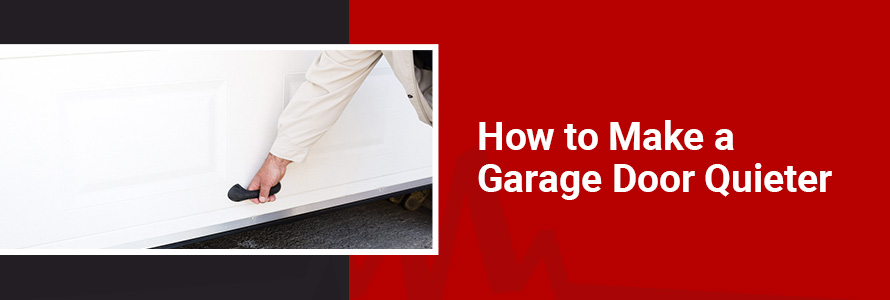
How to Make a Garage Door Quieter
As a homeowner or business owner, you want your garage door to operate smoothly and quietly. However, sometimes garage doors can make disturbing noises — thankfully, there are ways to resolve these issues with at-home solutions and professional help.
Common Garage Door Noises
Understanding and identifying the noise source is the first step to knowing how to make a garage door quieter. Some of the most likely culprits for your garage door’s noise include:
- Loose hardware
- Worn-out rollers
- Unbalanced door
- Lack of lubrication
- Faulty garage door opener
- Damaged tracks
- Old or worn-out springs
Identifying the Cause of the Noise
To identify the source of your garage door’s noise, follow these steps:
- Visual inspection: Examine the door’s hardware, rollers, tracks and springs for any visible signs of wear or damage.
- Audible inspection: Operate the door and listen for specific noises such as squeaking, grinding or banging. Try to pinpoint where the sound is coming from.
- Manual operation: Disconnect the opener and manually open and close the door to see if the noise persists. If it doesn’t, the issue is with the opener.
- Balance check: Test the door’s balance by opening it halfway and stopping. It may be unbalanced if both sides do not stay in place immediately.
5 Tips on How to Make Your Garage Door Quieter
There are several ways to make your garage door quieter, and the tips you need likely depend on your issue. It may be a case of implementing preventive maintenance or requiring an upgrade. The following are five tips for making your garage door quieter.
1. Taking Preventive Measures and Doing Maintenance
You can do routine garage door maintenance yourself. However, it is typically advisable to contact a professional to work through the following checklist:
- Inspect hardware: Regularly check and tighten all nuts, bolts and screws to prevent them from coming loose and to stop any rattling or vibrating.
- Clean tracks: Remove dirt and debris from the tracks to ensure the door operates smoothly.
- Examine rollers: Inspect rollers for wear and replace them if necessary, especially metal ones.
- Test the auto-reverse: To ensure the safety of people and objects, ensure the auto-reverse feature is functioning correctly.
- Inspect the weatherstripping: Check and replace weatherstripping to keep out dirt, prevent drafts and reduce noise.
2. Implementing Proper Lubrication
Proper lubrication is crucial to maintaining a quiet and smoothly operating garage door. It assists in reducing friction, prevents wear and tear and minimizes noise. Regular lubrication extends the life span of the door’s various moving components and ensures efficient operation.
You’ll want to apply a high-quality lubricant to rollers, hinges, tracks and springs to reduce friction and noise.
3. Ensuring Quiet Garage Door Hinges
Hinges on a garage door can produce noise due to friction between metal components, lack of lubrication or general wear and tear over time. Additionally, rust and dirt accumulation can contribute to squeaking or grinding sounds.
The following are steps to help quieten your garage door hinges: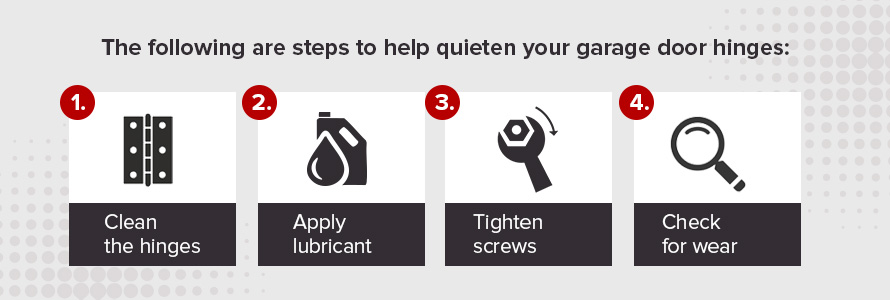
- Clean the hinges: Remove any dirt, dust or rust from the hinges using a cloth or small non-abrasive brush. Rust removal may require adding a protective layer afterward or replacing the hinges.
- Apply lubricant: Use a silicone-based spray or white lithium grease to lubricate the hinges’ pivot points every few months.
- Tighten screws: It is crucial to ensure all screws and bolts are securely tightened to prevent rattling or the hinges from coming loose.
- Check for wear: Inspect the hinges for signs of wear, damage or excessive rust and replace them if necessary.
4. Insulating a Garage Door to Make It Quieter
Insulation is another way to make your garage doors quieter, as it reduces noise and improves energy efficiency, making your garage more comfortable and cost-effective.
The benefits of insulating your garage door include:
- Noise reduction: Insulation helps dampen the sound of your garage door opening and closing and muffles external sounds, too.
- Energy efficiency: Insulated doors assist with maintaining a stable temperature inside the garage door, ultimately reducing heating and cooling costs.
- Enhanced durability: Most insulation adds strength to the door, making it more resistant to excessive damage from dents and other harm.
- Improved comfort: If you work in your garage, a well-insulated door makes it more comfortable, especially in extreme weather conditions.
- Increased home value: Upgrades like this can boost your home’s market value as an added benefit, should you wish to sell eventually.
There are various types of insulation materials available, which you can speak to a professional about, and these are:
- Foam board: These rigid panels provide excellent thermal resistance and are easy to install.
- Reflective insulation: This consists of reflective foil that reduces heat transfer and is ideal for warm or hot climates.
- Spray foam: It expands to fill gaps and provides a high R-value, offering superior insulation.
- Fiberglass batts: These are a more traditional insulation material that is highly effective and widely available.
- Polystyrene panels: This is a good choice if you want a lightweight, moisture-resistant option with good insulation properties.
5. Making Strategic Upgrades to Quieter Components
Upgrading your garage door to noise-reducing hardware can significantly enhance its quietness and performance. Here are some considerations when making upgrades to quieter components:
- Noise-reducing hardware options: Consider installing nylon rollers and rubber belt drives for a quieter solution. Nylon rollers are quieter than metal ones, and rubber belt drives reduce vibrations and noise compared to chain drives.
- Benefits of nylon rollers: Nylon rollers offer smoother and quieter operation than metal rollers, and they reduce friction and wear. This leads to less noise and longer-lasting performance.
- Investing in high-quality models: Opting for high-quality, quiet garage door models can provide long-term peace of mind. These models are designed with noise reduction in mind to ensure a quieter and more efficient operation.
- Cost-benefit evaluation: While the initial investment in noise-reducing components may be higher, the long-term benefits include reduced maintenance costs, improved performance and a quieter garage door.
When to Consider Professional Installation for Maximum Quietness
If your garage door continues to make persistent noise despite regular maintenance and attempted do-it-yourself (DIY) fixes, consider contacting a professional. Signs that a professional is needed include:
- Unusual grinding or banging sounds
- Difficulty in balancing the door
- Visible wear and tear on critical components
- Persistent and irregular noise despite your attempts
Professional garage door and component installers have the expertise to diagnose and address complex issues, ensuring optimal performance and quiet operation of your door. They can also recommend and install high-quality, noise-reducing components, providing long-term solutions. Additionally, professional installation often comes with warranties, which helps to ensure your investment is protected.
Trust the Professionals at Continental Door to Reduce Your Garage Door Noise

If you are in the greater Spokane and north Idaho area and need help reducing or eliminating the noise from your garage door, please ask for professional assistance from Continental Door. We provide a range of services and repair options, as well as residential garage door products and commercial garage door solutions, with offerings sure to meet your needs.
Please contact us online for a free quote, general questions, or to ask about our offerings. We will use our years of service history and knowledge to help you.
Manual Garage Door Security
Manual Garage Door Security Solutions
We live in a time when technology has automated many aspects of life, from your car’s transmission system to daily household operations. Garage doors are one of the areas that enjoy automation because nowadays, they come fit or designed to operate with garage door openers. These devices use electricity to open and close the garage door, and some come with a battery backup.
However, in the event of an extended power outage where the battery runs out, you’ll need another way to lock your garage door because the opener doesn’t work. This guide shows you how to lock a garage door manually.
How to Lock a Garage Door Manually From the Inside
It’s easy to manually lock garage doors from the inside if they already have a built-in locking system that serves as a backup when the door opener stops working. If your garage door has a built-in lock, simply slide the locking mechanism into place to prevent the door from opening from the outside. Before engaging the lock, however, disconnect your door opener so you can manually open and close the garage door. Doing that prevents automatic operation while the manual lock is in place, which can damage the door.
If your garage door doesn’t have a built-in locking system, you’ll need to install a manual feature. This can be as simple as inserting a padlock or zip tie through preexisting holes in the track. If you can’t find any holes in the track, you may have to drill them yourself to allow different locking methods, such as a padlock, a clamp or a slide lock.
It’s advisable to let a professional install a manual lock on your garage door to enhance security and prevent accidental damage to your door. As you wait out a power outage or repairs to your garage door opener, try a temporary locking solution like a C-clamp or vice grips. To lock a garage door manually from inside, stick the C-clamp on the track to prevent sliding.
How to Lock a Garage Door Manually From the Outside
Use a quick and easy solution like installing a hasp where the door touches the ground, and secure the garage door with a padlock. You could also weld loops on both sides of your garage door and secure it with strong padlocks if it’s a metal door. For wooden garage doors or those made from other materials, you could install a garage door kit since it comes with a key that allows you to lock and unlock your garage door from the outside.
There are two phases to installing a garage door kit. The lock has assemblies that you attach inside and outside the garage door. You first drill precise holes on the outside to drive the screws that hold the handle in place and then fit the matching assembly on the inside.
Installing a lock assembly on your garage door will allow you to lock it from the outside, but it can be a complex process as it requires exact measurements for proper installation. It’s best to let garage door service and repair experts handle the installation.
Types of Manual Locks for Garage Doors
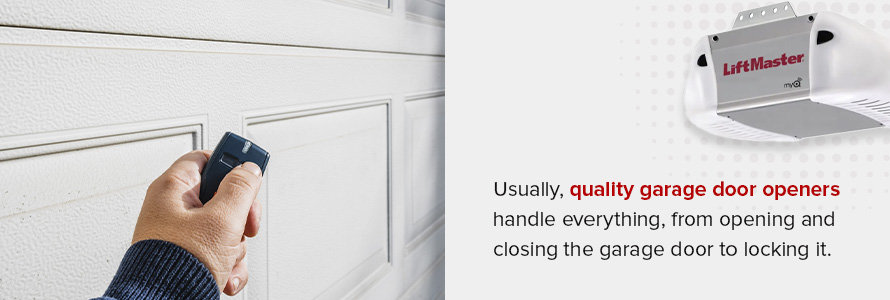
Usually, quality garage door openers handle everything, from opening and closing the garage door to locking it. With that automatic feature unavailable, you’ll need to install a manual locking system. Here are common types of manual locks you can use:
1. Slide Locks
Slide locks function the same way as deadbolts but are a heavy-duty option for manually locking a garage door from the inside. You install a slide lock by screwing it at the edge of your garage door and making a hole in the tracks where the lock’s metal bar goes through. Since you need to push the bar through the hole in the tracks, you can only operate a slide lock from inside your garage.
2. Deadbolt Locks
Deadbolts are secure locks that drive a bolt into a hole in the tracks. They can be keyed or keyless. Keyed deadbolts require a key to activate the bolt, meaning you can install them on the outside. However, you can only operate a keyless deadbolt from inside your garage because you need to push the bolt into place to secure the door.
3. Keyed Locks
Keyed locks are some of the most effective in the market, ranging from traditional to modern and sophisticated ones. The most basic keyed locks are padlocks, which you can use to secure your garage door from the inside and outside. Their main advantage is that they are simple and effective once you make holes or hoops to run them through.
The more sophisticated and reliable keyed locks are T handles and L handles, which you assemble on both sides of the door to allow locking and unlocking from the outside. These locks are stronger and more challenging to intruders than padlocks.
Common Lock Issues and Troubleshooting
Manual garage door locks can experience problems even if they don’t rely on electricity. Here are common issues you may notice with your manual locks:
- Misalignment: Garage door misalignment is a common issue that may occur due to damage or aging. A misalignment can also shift your manual lock out of position. Check and tighten loose screws or correct the misalignment to resolve the issue.
- Key issues: Challenges with keyed locks include breakage and the inability to turn the key properly inside the lock. You may use a tool like long-nose pliers to remove the broken key stuck inside the lock. Lubricating the lock will also help you turn the key with ease.
- Corrosion and rust: Since your garage door is exposed to the elements, the manual lock mechanism may show signs of corrosion and rust, which can damage the lock over time. Clean the lock to remove dirt and debris, and use recommended rust removers to eliminate rust. You may also lubricate the lock to prevent further corrosion.
Frequently Asked Questions
Here are some FAQs about garage door locks:
Can You Lock a Garage Door Without Power?
If your power is out and you need to lock your garage door quickly, unplug the door opener and pull down the emergency release cord to put the door into manual mode. Then, find any type of clamping device and attach it to the tracks on top of the roller to prevent the door from going up.
How Do I Switch to the Automatic Lock?
Switching back to the automatic feature allows your door opener to operate its automatic lock. Pull the emergency release cord down and forward toward the door, and it’ll reengage the door opener. On your wall station, press the button to open the door. It’ll click and lift the door. The automatic lock will function normally the next time you close your garage door.
Improve Garage Door Security With Continental Door
Knowing how to manually lock a garage door is important because you never know when the need will arise. You can use the temporary clamping-the-tracks method to keep your garage safe. However, you may want to invest in a professional installation as a permanent solution.
Work with a reliable garage door company like Continental Door for services you can trust. If you’re a resident of the greater Spokane area, contact Continental Door for professional assistance!
How to Change a Garage Door Opener Code
How to Change And Set a Garage Door Opener Code
If you have a garage door opener, you probably enjoy the incredible ease and convenience it provides. Most of the time, you probably use a remote control or digital app to open and close your door without difficulty, but if you need help programming or changing a keyless entry PIN code, here is a basic rundown.
Contact UsHow To Set Your Garage Door Code
Follow these four steps to change a garage door opener code through keypad reprogramming:
- Find the “Learn” button: You’ll find this button on the back of most garage door openers.
- Reset the code: To change a garage code, you first need to clear existing codes from the unit’s memory. You can erase the memory by pressing and holding down the “Learn” button until the indicator light next to it turns off.
- Enter your new code: Press the “Learn” button again and hold it down until the light turns on. You will have 30 seconds to input the new code and press “Enter.” The light should go off, indicating that you have successfully programmed the code.
- Test the code: Enter the code on the garage door keypad and wait for a response. If the reprogramming is successful, the door should open or close.
If the remote does not work after you attempt to change a garage keypad code, an error during the setup, like holding the “Learn” button, can be the cause. The button is responsible for programming and erasing linked remotes — holding it down can have the opposite effect. Try repeating the steps for changing a garage door code and note how long you press and release the “Learn” button.
How To Change Your Garage Door Code
- Enter your existing PIN: After entering your current PIN, hold down the # key.
- Enter new PIN: When the light blinks, release the # key and type in the new PIN. The light should blink again to indicate a successful PIN change.
- Test the new code: Wait 10 seconds, then input your PIN code and press enter. The door should now open or close.
Access Code Management
Managing garage door access codes involves regularly and securely changing them, using unique and hard-to-guess combinations and limiting the number of people who know the code. It’s also crucial to maintain control over who can access your garage door to protect against potential security vulnerabilities.
How To Set a Temporary Garage Door PIN
In some circumstances, you might set a temporary PIN to allow guests or service workers to access to your home without giving away your permanent PIN code. Setting a temporary PIN is simple:
- Type in your PIN and hold down the * key. When the light blinks three times, release the * key.
- Enter the temporary four-digit PIN of your choosing. The opener light should blink four times.
- Set the parameters for the temporary password. For time, type in the number of hours you want the PIN to work for and press *. For quantity, type in the number of times you want the password to work and press #. The highest number you can choose is 255. The light should blink once.
- After 10 seconds, test the opener. Remember that the test run counts as use. To clear a temporary password prematurely, follow the procedure for setting up the temporary PIN and set the number of hours or times to 0.
Smart Technology Integration
Garage door openers from leading manufacturers, like LiftMaster and Linear, integrate smart technology into their units for enhanced access and better control. These openers allow you to access your garage door from anywhere, lock it, control who goes in and out and track activity.
Contact Continental Door Today
Garage door openers have slightly different procedures for changing codes depending on the model. Your installer should let you know if this is the case.
If you are still struggling to set your PIN code for your garage door opener, or if you have any other questions or issues regarding your garage door or opener, contact Continental Door for assistance. Our knowledgeable team serves the Spokane and Northern Idaho areas with quality residential and commercial garage door products and services. We also offer 24/7 emergency services and free estimates and quotes.